|
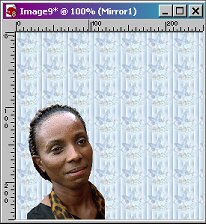
Using the Flood Fill tool  place the background image.
SAVE
|
| Open the Person image file copy. Resize
if necessary. (I resized the picture I used to 40%). It
should fill about half of the canvas vertically. |
| Copy the image and paste into our new image as
a new layer. Minimize the image. We will need it again
later. |
|
Use the Mover tool  to move the image in place. It should be be toward the left
bottom of the image. Rename this layer. I named mine
Lady
to move the image in place. It should be be toward the left
bottom of the image. Rename this layer. I named mine
Lady
|
|
SAVE |
|
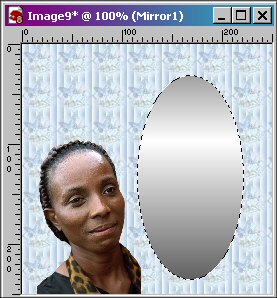
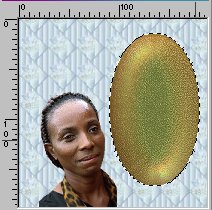
Create a new layer. Rename this layer Mirror. |
|
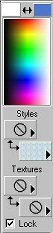
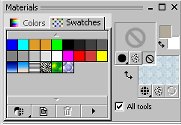
In the color picker(PSP7) or the Materials chooser in
PSP8, make the background the DCM-mirror
gradient. The foreground should be set to Null.
|
Using the Preset Shape Tool  draw an ellipse just to the right of the image. ( Don't make it too big
because we are going to need another oval behind this one that is 10
pixels wider on each side.)
draw an ellipse just to the right of the image. ( Don't make it too big
because we are going to need another oval behind this one that is 10
pixels wider on each side.)
|
|
SAVE |
|
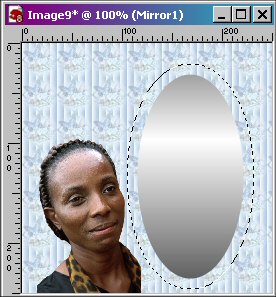
Click on Selections, Select All. Then click on
Selections Float. |
|
Click on Selections>Modify>Expand and expand your
selection 10 pixels.
 |
|
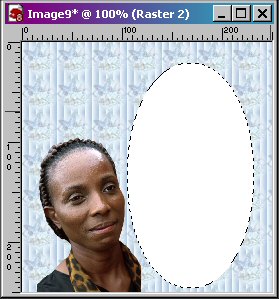
Create a new Layer Rename it Mirror Frame. |
|
Flood fill
the selection with White color
 |
|
SAVE |
|
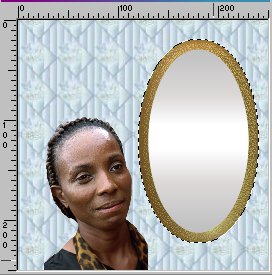
Click on Effects>Plugins>Flaming Pear>BladePro
or Super BladePRO
|
|
Using the D_Brushed Gold.9q9
Preset, fill the image with the Brushed
Gold
 |
| SAVE |
|
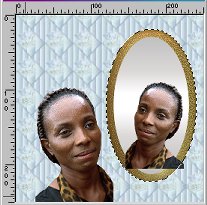
On the Layers Palette, click on the mirror
layer and move it above the Mirror Frame Layer.
|
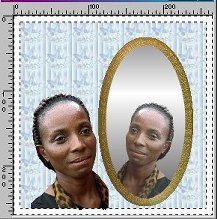
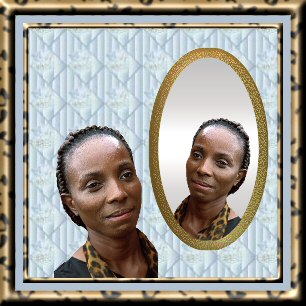
| From this
|
TO THIS
|
|
|
|
Create a new layer. Rename this layer
Reflection. Keep the image
selected. |
|
Bring up the image file that was minimized
earlier. Remember if you resized
it LEAVE IT THAT SIZE. We need
to resize again for our
reflection. Resize the image
to 75%, then click on
Image>mirror OR Press Ctrl+M.
|
| Copy this image and
place as a new layer. Using
the mover tool, position the lady in the
mirror. You may find that the
picture does not fit all the way to the bottom
of the image.
|
| We won't be able to
see the reflection if we move the layer below
the mirror, so we have to fix it..
First we will move our selection back to the
edge of the mirror. Click on Selections>Modify>Contract
and choose 10 pixels.

|
In order to remove
the parts that are outside the mirror we will
remove them. Click on
Selections>Invert
then hit the delete key.
|
|
Notice that the bottom of the mirror shows
because her neck does not come down far
enough. Lets fix
that. We will be using the clone
brush to fill in the gap. In order
to prevent the brush strokes from going onto the
frame, we need to go to Selections>invert. |
|
Now using the Clone tool  (PSP7)
or
(PSP7)
or  (PSP8) Fill in the gap at the
bottom. You might have to undo and redo
this several times until you get it like you
want. I found that using a tiny size
was not good. I used 12
pixels as my size. I cloned from
right to left and moved the scarf in at the
bottom. When you
are satisfied with the way it looks, Ctrl+D
to deselect.
(PSP8) Fill in the gap at the
bottom. You might have to undo and redo
this several times until you get it like you
want. I found that using a tiny size
was not good. I used 12
pixels as my size. I cloned from
right to left and moved the scarf in at the
bottom. When you
are satisfied with the way it looks, Ctrl+D
to deselect.
|
| SAVE |
|
We are now ready to make our frame.
|
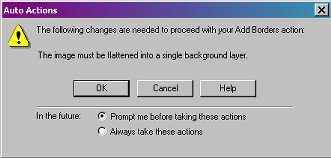
| Click on Image>Add
Borders. In PSP 8 you
may see this screen. If so click
OK.
 |
|
PSP7

|
PSP8
|
| Click Symmetric, make
the size 5, then click OK. |
|
Using the Magic Wand
tool  select the new border.
|
|
Set your background to pattern
and choose the Animal Leopard
pattern. Set the Scale
to 50. Using the Flood Fill
tool
fill the border with the Leopard pattern.
 |
| Now we will bevel
it. Click on Effects>3D
Effects>Inner
Bevel (In
PSP8 you will get a warning screen that the
image must be promoted to a full layer... Just
click ok) |
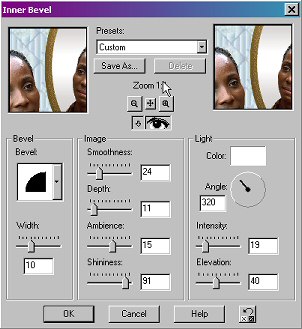
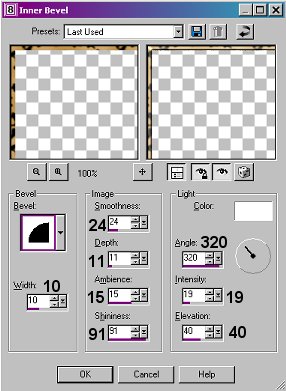
| Here are the inner
bevel settings I used.
Bevel, use the 2nd one, Width 10, Smoothness
24, Depth 11, Ambience 15, Shininess 91, Angle
320, Intensity 19, Elevation 40, Color
White.
|
|
PSP7
|
PSP8
|
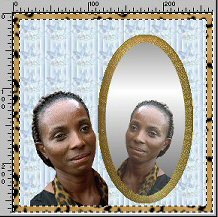
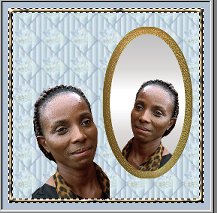
| Now we have
this
And on we go!!!
Note- at this point I usually save the
image with another filename, so if I want to
change the border later, I have the file up to
that point as a separate
file.
So save your file...with another Name... Example
add a 1 after the present
filename Lady.pspimage
would become Lady1.pspimage |
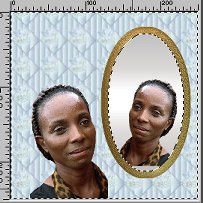
| Change your
background color to one of the darker blue
colors in the image. I used #B2C2D2.
Click on Image>Add Borders and add another
border 8 pixels wide.
And we have this.
|
| We will add borders
again. Change your background color
to white. Click on Image>Add
Borders and make it 15 pixels wide. |
|
Using the Magic Wand tool, select the
border. |
|
Set your background to pattern and choose the
Animal Leopard pattern.
Set the Scale to 50. Using the Flood Fill
tool
fill the border with the Leopard pattern.
|
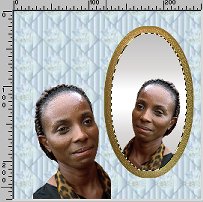
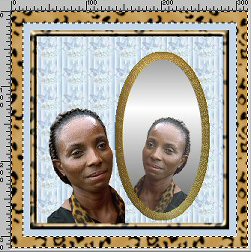
| Apply the inner bevel
using the same settings as before. |
|
And the image is finished!
|
|
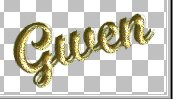
Now we need to add the name to the image. |
| Add a new Layer |
|
Be sure your background color is white.
Set the Foreground color to Null. |
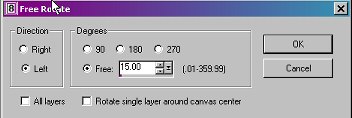
Using the Text tool
 type in the name you want. The font
I used is Script MT Bold. I chose to
rotate the text 15 degrees.
(To rotate the text, with the text selected,
click image>rotate>free rotate and type in
the amount to rotate. BE SURE that
rotate all layers is NOT selected.)
type in the name you want. The font
I used is Script MT Bold. I chose to
rotate the text 15 degrees.
(To rotate the text, with the text selected,
click image>rotate>free rotate and type in
the amount to rotate. BE SURE that
rotate all layers is NOT selected.)
|
|
Leave the name selected.
|
| I added a Super Blade
Pro treatment.
Click on Effects>Plugins>FlamingPear>Super
Blade Pro and choose the DCM-golddark.q5q
file and apply it to the text.
Yes, it is
dark.... |
| Add a new Layer |
| Now add the name
again, same settings and rotated the same
amount, right on top of the other one.
|
| Click on Effects>Plugins>FlamingPear>Super
Blade Pro and choose the DCM-gold7.q5q
file and apply it to the text.

|
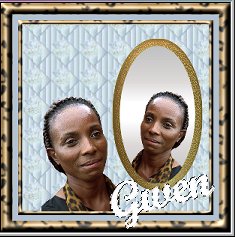
| With the text still
selected, move it down and to the right just a
little bit so the text underneath shows and you
can't see the background. Here's an
example:
|
On the layer palette,
turn off the background
layer  |
| With one of the raster
layers highlighted, right click and click merge,
then merge visible. |
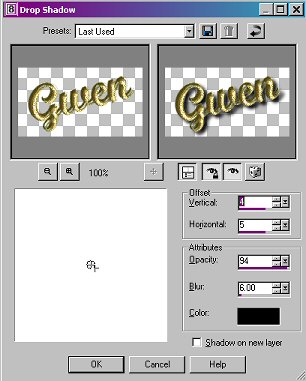
| On the merged image,
add a drop shadow. Here
are the settings I used.
Offset: Vertical - 4, Horizontal -
5, Opacity - 94, Blur - 6, Color
Black.
|
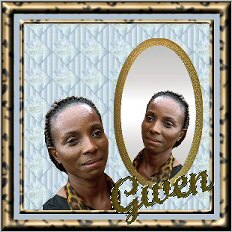
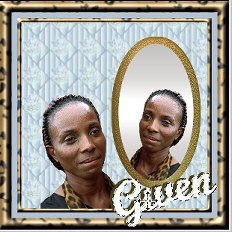
And there it is!!!!  |
And here's our final
image
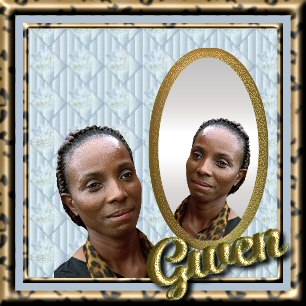 |
| And now you have
it! You did it! Congratulations. |
|
|
I hope you have enjoyed doing this tutorial
and along the way, maybe you learned something
new. |
|

Copyright 2003, 2004
Designs by Doris

|