| For a name with 5-8 characters
(or less) Open a new file 350 X 350, transparent,
16 million colors. If you name is
longer you may need a larger Canvas or reduce the
size of the text.
|
Set your foreground to
any color. Set your background color
to white.
Flood fill the background with the foreground
color. This is just so you can see the white
text. The reason for the white text is so
that you can then decorate it as you want
(gradient fill, pattern fill, apply a filter or
other texture, etc.) Now turn
off the foreground color.
|
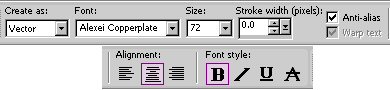
Click on the Text Tool  ,
then choose your font from the font list.
The size should be 72 or even 48 if your name is
longer. Choose create as Vector, Anti-alias
checked, Bold, Alignment center. ,
then choose your font from the font list.
The size should be 72 or even 48 if your name is
longer. Choose create as Vector, Anti-alias
checked, Bold, Alignment center.
|
 |
|
|
NOTE -- The examples
were created with the Font A & S Harlequin
(included in the zip file) |
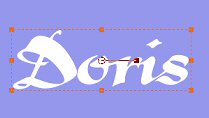
| Type your name and place it in the
center of the canvas. |
|
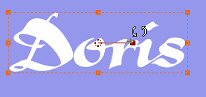
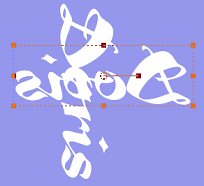
| Rotate the name 90 degrees.
Place your cursor on or near the right arm in
the center until you see the the two arrows.
Press and hold the left mouse button and rotate it
right 90 degrees. When you let go of the
mouse button, the text will
move. |
|
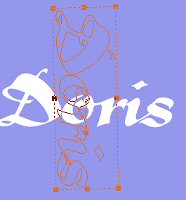
| Create a new Raster Layer. Now
click on the text tool and place another copy of
the name.
Click on Image, then mirror to mirror this
layer of text.
|
|
| Rotate this name the same as the
last one. Move it to the side a little so
you can see it. |

|
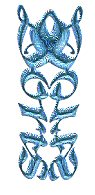
| Now move the text to the left until
the top is lined up and the lower case letters are
touching. |

|
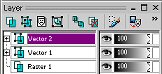
| You should have 3 layers. |
|
| Now click on the eye to turn off the
bottom (background) layer. Then select one
of the Vector Layers, right click and merge
visible.
Change the background color as you desire.
|
NOW Lets decorate. |
| Click on Selections>Select All,
then Selections>Float. This
will select the whole pattern. |
|
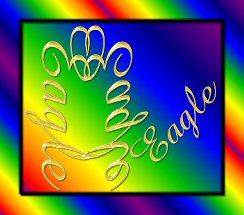
| Decide whether you want a gradient,
pattern or what you want to decorate with a
pattern or a filter.. |
Rainbow Gradient
Angle 45
Repeats 0
When saved as a jpg, the white background was
added |

|
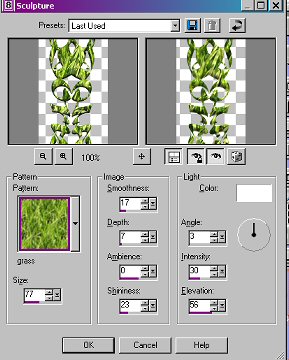 |
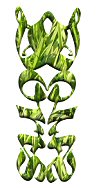
Effects>Sculpture>Grass
Size 27, Smoothness 17, Depth 7, Ambience 0,
Shininess 23, Color White, Angle 0, Intensity 30,
Elevation 56.
|
|
| This is the pattern with a Super
Blade Pro Treatment applied. |
 this image flipped
 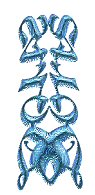 |
| Now when you have the color, or
other treatment applied we can finish the tag. |
|
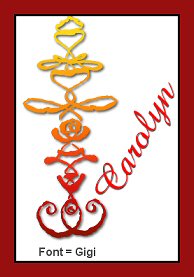
| Crop the image, leaving room on the
right side for a name to added.
Add the name with the font of your
choice. You may want to use
another font for the name than the one you created
the pattern with.
|
Add a drop shadow to the
name if you desire. |
| Add a tiny black border. Image
>Add Borders, symmetric checked, 2 pixels,
color black. (It will want to make it
one layer...that's ok). Then again Image
>Add Borders, symmetric checked, 10 pixels,
color white. |
|
| Use the Magic Wand to select the
white border and flood fill it with a gradient,
texture or picture.
The one I used on the red tag was one that I had created
called Red String. (I just used the line
tool, width 4, color red, Freehand, and squiggled
and curled a pattern.)
Then I used the Effects>Image Effects
>Seamless tiling setting to create the seamless
tile.) |
|
| Add a drop shadow... settings
Vertical 2
horizontal 2
opacity 100
Blur 2
Color Black..... Then repeat the drop
Shadow with the settings
Vertical -2
horizontal -2
opacity 100
Blur 2
Color Black
|
|
| And there you have a simple easy sig
tag.
|
Here are some
more examples:
|
|

|
|
|

|
|
|

|

|